Uncategorized
Where Our Designers Would Spend and Save On A Kitchen
Your kitchen is one of the most used spaces in your home. From three meals a day, to holiday baking, and all year entertaining you’re sure to use this space pretty often.
That’s why we put together a list of places where it’s recommended to spend or save to make your kitchen remodel as cost effective and useful as possible.
Spend: Appliances
In one of the most used rooms in your house, your kitchen appliances are sure to be some of the most used things in that room. Having good quality appliances that will look beautiful and last long enough that you won’t just spend all of the money you saved in repairs.
Energy efficient appliances can also help you save on your energy bill, saving you more money in the long term.
There are also some other considerations when choosing appliances. For example, if your home has an open floor plan a loud dishwasher could really put a damper on your TV time, family time, and even when you’re entertaining.
Buying a cheap fridge could be loud enough to notice it, and cost more in repairs over time than what you spent to buy it.
One splurge that has been a rising star is an instant hot water dispenser. This energy efficient luxury comes with a safety handle to prevent burns while making cooking, cleaning, and tea making a whole lot easier.
Save: Reclaiming and Recycling
A top tip to save some money is by finding places where you could use reclaimed or recycled materials in your kitchen. One example is using reclaimed countertops. One family used old school lab tables made from iroko wood, an African hard wood, that they livened up to create beautiful wooden countertops. Paired with stone or quartz counters if needed these could be a great addition to your kitchen, not to mention a conversation piece.
You could also save by buying stone remnants. These are pieces of stone usually left over from larger jobs that are a great way to save on having a gorgeous stone island, or bar top.
Preowned cabinets are another way to save and often they need just a little TLC to be brought back to life. On the flip side of this if your cabinets, countertops, and appliances are still in good condition you could be the person providing some of these money saving recycled materials while adding a little more to your own renovation budget.
Spend: Durable Materials
Going for reclaimed items just isn’t some homeowners style. And that’s perfectly fine! Whether going new or used finding materials that are durable and easy to maintain is worth the extra cost that may come up front.
Using things like stone remnants for smaller projects, or hard wood can really make a difference when it comes to the life and longevity of the materials you are investing in.
When it comes to kitchen cabinets, going for solid wood is without a doubt a worthwhile investment. These will stand the test of time, won’t begin to look out of date, and won’t need to be replaced in just a few years. A good quality solid wood kitchen can last over thirty years, even through the trend and color changes we’ve been seeing so often.
Save: Strategic Planning
Strategic planning is essential to being able to achieve some of the “spends” you may want to include in your kitchen renovation. Things like getting all of your new appliances at one time (including in your utility room) can save of delivery charges.
You can also opt for wider cabinets which, while being more efficient are also cheaper by the linear foot.
This also comes down to measurements and purchasing to ensure you’re not buying more than you need.
A knowledgeable designer will help guide you through choices like these to suit what you are looking to accomplish. They know the right questions to ask and how to properly measure for things like cabinets, counter tops, flooring, and appliances.
Spend: Good Design
Remodeling your kitchen is a huge deal, and can be intimidating to start. It’s always a good idea to consult with a designer, even to get some help with planning. And taking the stress off of your shoulders is exactly what design-build firms like Satin Touch, Inc. are for.
10 Kitchen Trends to Watch in 2023
Trends come and go, but if you see something you love take it and run! Mitchell Parker gives us some awesome insight on the trends coming to kitchens in 2023.
When remodeling a kitchen, it’s helpful to know which choices are popular among other homeowners, even if you end up diverging from the crowd. A look at the just-released 2023 U.S. Houzz Kitchen Trends Study offers a good jumping-off point for making those decisions. Here you’ll find useful details on homeowner preferences for the scope and size of a kitchen, its look and feel, and common products and features.
1. Layout Changes Continue to Lead
When it comes to major kitchen remodeling changes, transforming the layout tops the list for homeowners (45%), followed by upgrading systems (41%) and modifying walls (36%).
2. Many Kitchens Are Increasing in Size
Meanwhile, many kitchens are getting larger. More than a quarter of homeowners (27%) make their kitchen somewhat larger as part of a remodel. And 6% of homeowners end up with a significantly larger kitchen, increasing the size by more than 50%.
A slight majority of kitchens (51%) are 200 square feet or more. More than a third (35%) are between 100 and 199 square feet, and about 1 in 7 (14%) are less than 100 square feet.
3. Open Kitchens Appeal
Speaking of open spaces, many homeowners once again are seeking kitchens that are open to interior spaces (40%, up from 38% in 2022) and open to outdoor spaces (20%, up from 18% in 2022).
Designing a kitchen without a wall separating it from other interior spaces remains the most popular choice (61%), though the option decreased in popularity by 4 percentage points year over year.
When opening a kitchen to outdoor spaces, homeowners most often go with double doors or a row of doors (46%).
Changes to kitchen layouts are common too. Nearly half of homeowners (45%) redo their kitchen layout. L-shaped (40%) and U-shaped (31%) kitchens are the most popular styles. Fewer homeowners select a galley layout (11%) or single-wall setup (8%).
4. Islands Remain Popular
The majority of remodeling homeowners (55%) either add an island or upgrade an existing one. More than a third (37%) have no island and a relatively small portion of homeowners (8%) keep their island as is.
When it comes to upgraded islands, the most popular storage options are drawers (79%) and cabinets with doors (79%). Less popular are open shelves (14%), though that share rose 3 percentage points year over year. Only 1% of homeowners choose no storage for their upgraded island.
As for size and shape, the vast majority of homeowners create an island that’s 6 feet or longer (74%) and in a rectangular or square shape (82%).
Nearly half of homeowners (46%) choose an island color that contrasts with the main cabinets. Top contrasting island colors are blue (24%), gray (15%), black (12%), medium-tone wood (12%) and dark wood (11%, a 5-point increase year over year).
5. Style Makeovers Are Still Widespread
More than 4 in 5 homeowners (83%) change the style of their kitchen when remodeling. Transitional remains the top style choice (23%), though the share of homeowners choosing it is down 2 points year over year.
Modern style (14%) has overtaken contemporary (12%) as the second-most popular choice. And more than 1 in 10 homeowners choose a farmhouse or traditional style.
6. Demand for Gray Walls Fades Again
White has long been a popular wall color choice in kitchens, but it’s increasingly the dominant selection. More than a third of homeowners (35%) go with white walls, a 3-point increase year over year. White also dominates backsplash color. More than 2 out of 5 homeowners (41%) choose a white backsplash. And, as mentioned in a previous article on the 2023 U.S. Houzz Kitchen Trends Study, about the same amount of homeowners (40%) choose white cabinets.
Gray, long the second-most popular wall color choice, falls further out of favor with less than a quarter of homeowners (24%) choosing the color, down 4 points year over year, the fourth consecutive year of decline.
When it comes to appliances, it’s hard to top stainless steel. The finish is by far the favorite, with three-quarters (74%) of homeowners choosing it.
7. Multicolored Countertops Fall Further Out of Favor
Most remodeling homeowners (90%) upgrade their countertops in a kitchen remodel.
Again, white dominates among preferences and increasingly so (41% in 2023, compared with 39% in 2022 and 33% in 2021).
Meanwhile, the popularity of multicolored countertops has steadily declined (19% in 2023, from 24% in 2022 and 26% in 2021).
Among homeowners who are upgrading an island, one-fourth (25%) choose a countertop color that contrasts with the perimeter countertop color. The most commonly chosen island countertop colors to contrast with a perimeter countertop are white (29%), medium-tone wood (16%), black (11%, up 4 points year over year) and gray (11%).
The most popular countertop material remains engineered quartz (36%), though the choice dropped 6 points year over year. Other common material choices are granite (23%), butcher block or wood slab (10%), quartzite (8%) and marble (5%).
One-quarter of remodeling homeowners (25%) contrast their island countertop material with the surrounding countertop material. The top contrasting countertop material choice is butcher block or wood slab (31%).
8. Ceramic and Porcelain Tile Top Backsplash Choices
9. Loads of Dishwashers
A majority of homeowners (53%) upgrade all of their appliances during a kitchen remodel. About a third (32%) upgrade some.
The most commonly upgraded appliances are the dishwasher (75%, up 4 points year over year), refrigerator (75%), microwave (72%), range (63%), range hood (59%) and garbage disposal (52%).
The majority of homeowners select new appliances based on functionality (64%) and quality (63%). But look and feel (54%), as well as energy efficiency (22%), are also important.
10. Vinyl Again Trails Hardwood for Flooring
A majority of homeowners (67%) upgrade their flooring during a kitchen remodel. One-fourth of homeowners choose stained or unstained hardwood, consistent with last year.
Vinyl or resilient flooring is also popular (22%), as are ceramic or porcelain tile (19%) and engineered wood (15%).
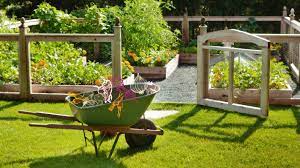
8 Ways to Work on Your Yard This Winter Without Heading Outside
It may be staying cold for while yet in Minnesota, but Marianne Lipanovich has some awesome ideas to get ahead on your lawn and gardening this year.
Winter weather can keep even the most avid gardener from working outside. But that doesn’t mean you have to give up all gardening activities until spring. Instead, use this time to focus on planning for later in the year or to knock out a couple of garden-related tasks that can be done now. Once warmer weather arrives, you’ll be ready to get outside and enjoy your space.
1. Pause and Reflect
Think back on the past year and how your space evolved through the seasons. What were your successes? Also think about what wasn’t successful or any areas that were overlooked. Maybe it’s time to add plantings to a neglected corner of the yard. Perhaps you want to expand an edible garden or add a shade tree. Now’s the time to brainstorm for the upcoming year.
2. Start Seeds
It may be too early to plant outside in all but the mildest climates, but you can get your garden ready for the season by starting seeds — especially annuals and edibles — indoors. Browse seed catalogs for familiar favorites and new possibilities.
Get your seeds off to a good start with the right light and consistent moisture. A sunny window will work well, or you can create your own mini plant nursery with grow lights and heat mats (available at local nurseries, home improvement stores or online).
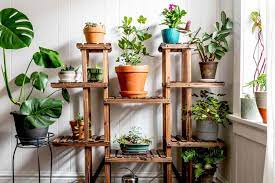
3. Bring Your Garden Inside
Keep your gardening thumb green with an indoor garden. Many outdoor plants, including citrus, herbs and succulents, will thrive in a warm, sunny spot in your house. You can also add more indoor greenery with traditional houseplants, with orchids providing long-lasting floral color.

4. Welcome Wildlife
Not all birds fly south for the winter. Consider setting up bird feeders and watering holes for the locals to enjoy. (You can also set up feeding and watering areas for local animals at the same time.) If you live where birdbaths and small ponds will freeze over, look for heaters or devices to keep the water moving and ice-free.
Adding native plants is a longer-term solution that will provide food and shelter for nonmigratory birds and other animals.
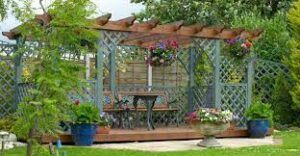
5. Enhance Your Views
Spend some time taking in the yard from inside your home. Would a focal point, such as an accent plant or garden structure, help draw the eye (and eventually people) outside? Are there barren spots where new plantings could provide year-round interest and enhanced garden views? Or perhaps you need to screen an unpleasant sight or add privacy?
6. Research Landscape Pros
If you’re envisioning an overhauled design or any outdoor construction projects this year, now’s a good time to start researching professionals you might want to work with.
Pull together ideas, create a budget and look at possible timelines. Then contact your top pro choices. When the weather turns and you’re ready to begin work on the project, you’ll already have a team and a spot in the schedule.

7. Tidy Your Garden Workspace

Use the winter months to tackle garden maintenance tasks that can take place indoors. Clear out broken pots and materials you don’t use. Clean up and repair the garden tools you want to keep. Finally, ti
dy up and organize your garden shed, greenhouse or potting bench. You’ll be able to get started in the garden once the weather warms up.
8. Savor the Season
Sit back, relax and celebrate what the season has to offer from the comfort of your home. Pull a chair up to the window and watch the play of the rain and snow in the yard, enjoy the stark beauty of the bare branches of trees and shrubs or simply appreciate the cozy warmth of a pleasant garden view.

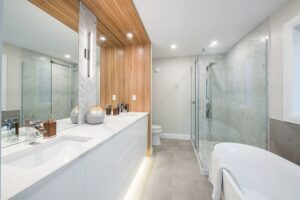
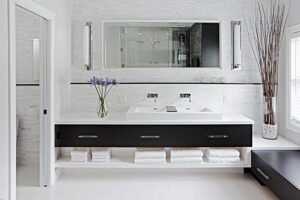
The Top 5 Bathroom Makeovers of 2022
Suzanne Ennis offers a great wrap up of the bathroom makeover trends seen in 2022.
A well-designed bathroom is often the result of months of planning, designing and construction that involves homeowners and a team of remodeling professionals. Our Bathroom of the Week series tries to capture a snapshot of that process with profiles of beautiful bathrooms and the details remodeling pros used to make those spaces look and feel good. To see what kinds of bathroom styles and features resonated most with homeowners in 2022, check out this countdown of the five most-read Bathroom of the Week stories of the year. Browse the collection, then click the link to each article to learn more about the update.
5. White, Wood and Marble for a Serene Space
The “before” version of this bathroom had a basic double vanity with minimal storage, a bulky and nonfunctional jetted tub and blah finishes — all of which made it far from the modern, spa-like sanctuary its owners were after. So they hired designer Kate Freund and the wife’s father, builder Patrick Sexton, to create this warm and modern “after.”
Without changing the basic layout (and with inspiration from Houzz), they added a new custom walnut double vanity with lots of storage and appliance pullouts. They also installed heated marble hexagonal floor tiles, a streamlined freestanding tub and a marble-lined steam shower that makes them say “spa-ahhhh.”
4. Clean, Contemporary Style for Empty Nesters
A couple worked with interior designer Sharon Kory to create this contemporary bathroom in their new-build home. Among the features that lend it a crisp and elegant look are a large built-in soaking tub, a gray double vanity with high-gloss acrylic drawer and door fronts, and large-format marble tiles on the main floor and walls.
Functional elements include a low-curb shower with 3-by-3-inch marble floor tiles that match the main floor tile but offer better grip, as well as a handheld shower within grasp of a built-in bench. Plus there’s a pocket door that opens to a toilet closet. A linen closet had been in the design too, but they retrofitted it to create a built-in coffee niche, a perk of not needing much storage.

3. A Curbless Shower Adds Accessibility
One of this bathroom’s owners uses a rollator walker and crutches, so their cramped, obstacle-filled original bathroom needed an overhaul with accessibility in mind. To that end, design-build pro Sean Onal removed a shower stall and jetted tub and created an expanded curbless shower with a built-in bench, grab bars and a mosaic-tile floor with good grip. The main floor has large-format tile with a white nonslip finish.
To improve maneuverability, Onal installed floating sinks and widened a narrow entrance. At the same time, he gave the bathroom’s style a major boost with a timeless white-and-gray color scheme.
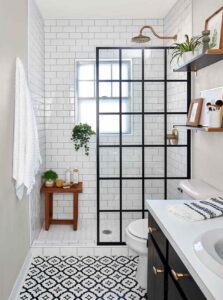
2. New Style and Layout in 75 Square Feet
Tasked with turning a bland, awkward bathroom into a stylish and functional shared family space, designer Jen Montague Clark completely rethought the layout. She eliminated a tub and tiny shower stall in favor of a shower-tub combo with a hinged frameless glass panel. That freed up room to replace a single-sink vanity with a cool midcentury-industrial-style freestanding double vanity.
The old shower stall plus a sliver of an adjacent closet became a water closet with a pocket door, and plenty of recessed lighting brightened the space. Then, starting with patterned blue-green porcelain encaustic floor tiles, Montague Clark added warm, textured finishes. Now the bathroom can accommodate more than one person at a time and has a welcoming “affordable luxury” look.
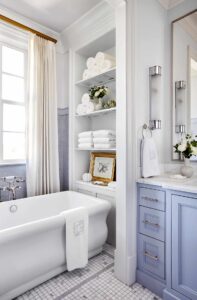
1. Storage and a Spa Feel in 65 Square Feet
The most popular bathroom makeover of 2022 is also the smallest of the bunch, though it’s still spacious by most standards. And thanks to designer Amy Herbert — and design inspiration from Houzz — what it lacks in square footage it makes up for in style and efficient use of space.
Herbert replaced a shower-tub combo, impractical vanity and bulky radiator with a roomy glass-enclosed curbless shower, heated floors and a floating bamboo vanity and storage towers. The shower’s textured blue tiles complement the warm bamboo tones and enhance the room’s calming yet personality-filled vibe.
7 Tips to Improve Kitchen Flow
Introduction
The kitchen is the heart of your home, and it’s important to get it right. The flow between each area can make or break your kitchen design. If you did some cooking for Thanksgiving you may have noticed that things could have gone a little better, but are unsure of where to even start. Here are 7 tips to improve the flow in your kitchen:
Assess your kitchen.
The first step to any successful kitchen redesign is to assess your current situation. What’s going well? What could be improved? Are you dealing with a specific problem—such as a lack of storage space, too many appliances or an inefficient layout—that needs to be addressed right away?
Understanding your needs and wants in relation to the space at hand is essential for deciding where and how to make changes. It’s also important to consider the flow between areas like the kitchen and dining room, where people often transition between tasks.
Take time to think about how you work in the kitchen
- Ask yourself: What do I do in the kitchen?
- How often do I do it?
- How long does it take?
- How much space is involved (e.g., am I chopping vegetables, or am I making an elaborate dinner for eight people)?
If you’re a beginner cook, your answers will be different than if you are an experienced chef. If you are a novice cook, there’s no shame in having a pretty simple setup; just make sure that it works well for your needs. For instance, if preparing an omelet is something that takes up only half an hour every Sunday morning and involves only a few ingredients and utensils, then set aside some counter space near the sink so that everything is within arm’s reach of each other as needed—no need to buy expensive storage containers or drawers!
Designate zones for prep, cooking and cleanup.
Designate zones for prep work, cooking and cleanup. Envision your kitchen as a series of zones, each with its own distinct purpose.
- The prep zone is where you’ll cook up ingredients like meat or veggies before adding them to other dishes. This step can be done outside on the grill or indoors on the stovetop or in an oven.
- The cooking area is where you put together whatever meal it is you’re making—for example, chopping vegetables for salsa or browning ground beef for tacos.
- The cleanup zone is where dirty dishes are washed and dried after being used in the other areas of the kitchen; these may include pots, pans and utensils that were used during food preparation and storage containers that held pre-cooked ingredients before they were added to meals (like canned beans).
Add in convenience features for everyday tasks
Adding in convenience features for everyday tasks is a great way to make your kitchen flow better. It’s simple, and you can do it yourself with relatively little effort.
One of the most useful things you can add is an electric kettle. This will allow you to quickly heat water without having to wait on a stove top or microwave. If a stove-top kettle is out of your budget, try using a microwave safe glass container instead—it works almost as well!
If you want to get more organized in the kitchen, try investing in some drawer organizers. These are great because they allow you to store things like silverware and utensils in drawers instead of having them all over your countertops or hanging on hooks above cabinets. This makes it easier for people to find what they need when cooking or cleaning up after a meal.
Evaluate your storage space.
Storage is a vital part of the kitchen flow. You may have plenty of storage space, but if your items are in the wrong place or are difficult to access, it’s going to impact how easy it is to operate your kitchen. To make sure that you’re using your storage space effectively, consider these tips:
- Don’t store items that you don’t use often. If you don’t use something regularly, find a way to store it elsewhere (such as in an attic) or donate it so it can be used by someone else.
- Don’t store items that are hard to get at easily.
- Keep frequently-used utensils and appliances near where people will need them most often during cooking time—the sink, stovetop, and oven should all be within close reach of each other for maximum efficiency when prepping meals in this area of the kitchen (or any other part). This also means making sure there isn’t too much clutter around work surfaces so everything stays out where it needs to go without being hidden behind piles of random stuff!
Maximize vertical space.
- Maximize vertical space. With a small kitchen, it’s important to maximize your vertical storage space as much as possible. I recommend using wall space over cabinets because it gives you more options for shelving and cabinets are often too bulky for tight spaces.
- Maximize under-the-sink storage. Most kitchens have an awkward gap between the sink and the cabinet below it, which is prime real estate for storing things like baking supplies and cleaning products that could otherwise go on shelves in other parts of your kitchen but might get lost among food items or spices if kept there instead. Use baskets or bins to store these items here so they’re easily accessed when needed (and out of sight when not).
- Use the top over your oven/fridge as well—think about how many times you move things from one surface to another throughout cooking: measuring cups going from countertop to stovetop back down again; cutting board moved from sink side next time we need more room on our cutting board tray that sits next door near our fridge door (which is where we keep most of our prep materials); etcetera! All those things can be put up high so they stay within easy reach no matter where else you happen
The best kitchen layouts can make a big difference
Whether or not you’re in the process of renovating your kitchen, it’s important to think about how you work in the space. A well-designed kitchen layout can make a big difference in terms of efficiency and productivity. The best kitchens are designed with specific zones for cooking, preparing food and cleaning up. They also include convenient features that make everyday tasks more efficient. When evaluating your storage space, think about what items will be used most frequently and where they should go so that they’re always within reach but not in the way (or vice versa). Maximize vertical space by utilizing overhead cabinets, pull-out drawers or even wall-mounted hooks for pots and pans.
Conclusion
The kitchen is a place for inspiration, creativity and family time. It should be easy to work in and function well. By following these tips to improve your kitchen flow you will be on your way to creating a space that works for you!
How to Remodel the Laundry Room
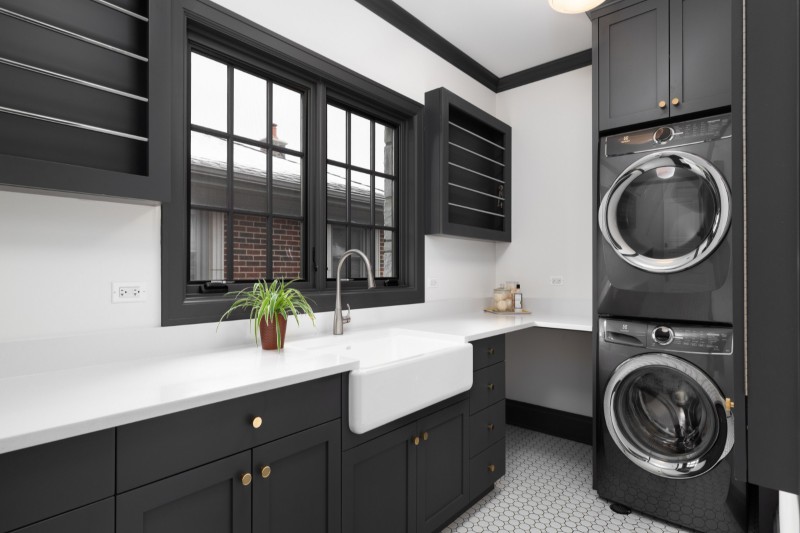
Use this step-by-step guide to figure out what you want and how to make it happen.
What’s funny about laundry rooms is that we’re in them a lot, yet we approach these spaces as an afterthought.
There’s no standard laundry room size, shape or layout. Often these utility spaces are created in awkward leftover areas after every other room in the home has been planned out. Or they’re banished to dark corners of basements and garages. And yet you’ve probably noticed you’re spending a lot of time in that confined area. Shouldn’t that space warrant extra attention?
This step-by-step workbook is how HomesReinvented by SatinTouch will help you think through your options and plan some ways to make your laundry room function better and look nicer.
Step 1: What Are You Hoping to Achieve?
Why have you decided to remodel your laundry room? And what’s important to you? The answers to these questions will inevitably affect your decisions and, above all, your budget. Are you simply after more function? Or are you hoping to make the space look nice too?
Do you plan on working with the space you have? Or are you relocating your laundry room to another part of your house? Buying new appliances and adding some paint or wallpaper is one thing; knocking down walls, rerouting plumbing and building an entirely new room is another.
Another question you should ask is, “Why now?” It’s good to think about why this is the right time to remodel or redecorate your laundry room. Is this a one-off project or part of a larger remodel? If you plan on eventually tackling a larger project, such as a kitchen or master bathroom, it could be more cost-effective to wait and do everything at once, when you’ll probably already have a contractor, tile installer and other professionals on site doing work.
If you already have a painter coming in or a tiler for your kitchen, get a quote for other spaces too, like laundry rooms aren’t always just about washing and drying clothes. People tend to store all kinds of things in their laundry rooms, from batteries to flashlights to dog food.
So while you’re planning, think about the other functions you want your laundry room to serve and make sure you create room for those things. Many people also make their laundry room function as mudrooms; storage rooms for vacuum cleaners, brooms and sports gear; butler pantries; command centers for organizing family calendars and mail; home offices; craft rooms; pet rooms; and more.
The way you wash, dry and fold clothes will dictate how your new space functions. How often do you do laundry? Once a week or every day? If you have a large family with multiple hampers, maybe you want to set up a system of individual baskets that better organizes laundry for each member of your family.
Where do you fold clothes? Do you prefer to fold everything in the laundry room and then carry it to the bedrooms? If the former, adequate counter space will be important. Maybe you want to consider a large island if your budget permits.
Or maybe you like folding clothes on the sofa so you can watch TV while you work. If that’s the case, maybe counters aren’t vital for you and you’d rather use the space for something else, such as more storage cabinets.
Also, if you like to hang up clothes right away, maybe you’ll want to make sure you get a hanging rod in your space. Have lots of delicates? Perhaps drying racks are in order. Do you iron often or prefer to use a steam setting on your appliances?
When do you do laundry? If it’s during the day, does your space have natural light? If not, could you consider adding a window? If you prefer to do laundry at night, maybe adequate artificial lighting is more important to you.
If you’re worried that your laundry habits might not be the most efficient way of doing things and you’re unsure of how you can make them better, it’s probably a good idea to bring a professional onboard for help. He or she can help you think through the way your space should function and even offer up solutions you might not have considered. If you don’t have a personal relationship with a designer, the designers at HomesReinvented by SatinTouch can help.
The selection of your appliances, or your existing appliances, will greatly affect other decisions for your space. For example, do you have or want side-by-side or stacked appliances? Stacked appliances can save space, but shorter people might need a step stool to reach the top controls.
Do you want or have front-loading or top-loading appliances? Front loaders give you the option of adding a countertop for folding and sorting, but some people say front loaders often don’t drain sufficiently, leading to mildew inside the machine. That may be the case with older models but that many manufacturers have sorted out the issue with newer models. At any rate, it’s best to do thorough research.
Once you have the basic function of your laundry room pinned down, it’s time to look at your budget again to see how you can make your space more comfortable and stylish. Create an ideabook of photos of laundry rooms from the internet to get the juices running.
Counter space for folding is perhaps the most popular special feature. If you’ve got front-loading machines, consider adding a countertop above them. Or if you’ve got the space and budget, consider a large island on which you can spread out all your laundry.
As for countertop material, stick with something durable, such as quartz. You want a material that can stand up to spilled detergents and bleach.
The second-most requested special feature is probably a deep sink for soaking or hand-washing delicates and a spray attachment for the faucet for doing spot treatments.
Here are a few additional features to consider:
Rod for hanging clothes
TV or radio
Window
Wine fridge
Pet-washing station (as shown on the following page)
Rolling laundry carts
Fold-down ironing board
Drying rack for delicates
Additional storage closets
Step 2: Research and Budget
Before beginning any home project, you need to know how much you can spend. A new washer and dryer can set you back a couple of thousand dollars right off the bat. Moving plumbing around, adding a sink or window and building custom cabinets are also significant costs.
Laundry rooms are typically small spaces, and if you already have good appliances and adequate storage, the cost of making over your space could be as low as the price of paint or wallpaper (yes, I said wallpaper). It all depends on the level of design you’re striving for. Some people just want their laundry room to function. So decide if this is a space where you want to invest or if that money could be put to better use elsewhere.
When creating your budget, start with the big expenses: cabinets, flooring and appliances. These will provide the function. After all, laundry rooms are utilitarian spaces first and foremost. Once you tackle that, you can move on to spiffing things up if your budget permits.
To save money, decide what you can keep and what you need to replace. Can you get by with painting or refacing the existing cabinets rather than replacing them? Can you make do with the flooring? Buying appliances during holiday sales or buying floor models can also help keep costs down.
If you’re moving your laundry room to a new location in your home, you’ll have to think about venting, plumbing, draining, knocking down walls and more, all of which add significantly to the cost.
Step 3: Find a Professional
After determining the general scope of your project, you’ll probably have an idea of whether you need to hire a professional for help. If you’re doing a major renovation, you’ll want to assemble a knowledgeable team to make sure things run smoothly. A professional can help you think through problems and offer solutions you might not have thought of, such as adding a window for natural lighting.
Step 4: Think About Style
Once you’ve tackled the functionality of your space, consider spiffing things up a bit with paint, wallpaper, tile and accessories. If your laundry room is tucked out of the sight of guests, you might want to consider experimenting with some fun, energetic colors or prints.
The more visible your space, the more you’ll probably want it to look nice. A laundry area in a side-entry mudroom that guests and family members often pass through might warrant some extra attention. On the other hand, if your laundry area is in an unfinished basement where few people ever venture, then looks might not be as important to you.
Wallpaper is another good option (yes, I said wallpaper, again). A fun print can energize your space, especially if you lack natural light. A happy color or print can transform it so it’s not a place you dread going to. It adds a little nice surprise, and it’s not a big expense in the scheme of things.
A tile backsplash is another way to add style, but you may want to keep the tile neutral so they can change paint colors more easily.
And remember, laundry rooms are typically small, so the cost of wallpaper or even a backsplash may not break the bank. It’s a good place to spend a little extra to cheer things up.
Another simple add-on is window treatments, a decorative light fixture and a rug, all of which help create an inviting atmosphere.
Step 5: Construction Documents, Estimates, Demo, Installation and More
At this stage, the process for remodeling or making over a laundry room is similar to any other renovation project. You’ll be perusing floor plans, elevations and other relevant drawings. You’ll iron out the finer details and get a grip on what permits need to be pulled.
If you’re working with a designer, he or she will probably help you interview contractors and get estimates on the cost of your project. Once you have that settled, you’ll begin preparing for installation by making sure you have all the materials on hand, as well as getting your space ready for demolition.
Make sure you save all receipts, construction documents, warranties and product information so you can properly maintain and care for your appliances and other features.
After your project is finished, walk through the space and make note of anything that’s cracked, chipped, broken or installed incorrectly. Get this list to the person who’s in charge of fixing these mistakes and include information about how and when the work should be completed.
As Requested by One of Our Clients, Tips for Designing Your Bedroom
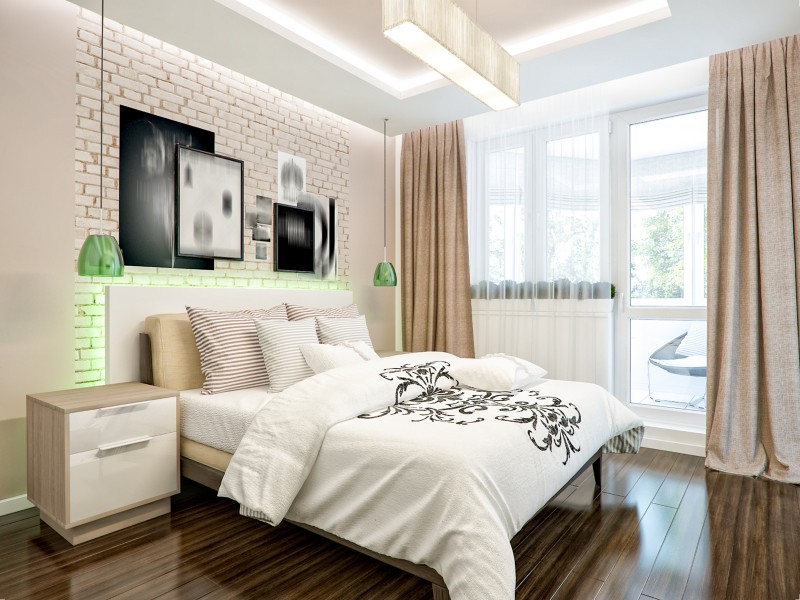
Learn how to think about light, layout, circulation and views to get the bedroom of your dreams.
Have you ever been in a room that just feels right? Nine times out of 10, it’s because it has a simple design that functions well. But creating a simple design is harder than it looks — particularly in bedrooms.
Why? Because every bedroom absolutely has to have a bed in it. And beds are big and ungainly, and dictate the placement of every other object in the room. But if you’re lucky enough to be planning a bedroom from scratch or remodeling an existing bedroom, you can control the other elements and create a space that’s both practical and pretty.
Because the bedroom is one of the simplest rooms in the house, it’s often overlooked. One of the first steps to a great bedroom design is having an efficient and well-designed floor plan that gives you everything you want — no matter how much space you start with.
Here are seven tips to help you get the most out of your bedroom.
1. Plan for Simple Circulation
Try to keep your circulation on one side of the room. Hotels do a great job of this. There’s a reason 90 percent of hotels have the same floor plan: because it’s simple and it works.
Circulation plans become a little more challenging with en suite rooms — bedrooms with bathrooms attached, as in the plans above — or bedrooms that have doors to the outside. To save on space, pay attention to where you locate the bathroom and closet in your bedroom. Rooms that have bathroom or closet access before the sleeping area require a longer hall.
If you organize the circulation so the bathroom and closet are accessed through the sleeping area, you don’t need a separate hall, and you can add the circulation space into the room to make it feel larger too.
2. Focus on the View
A bedroom always feels nicer when the first thing you experience is a pleasant view out the window — as opposed to a view looking straight at the bed. If you’re designing a new bedroom or reworking an old one, try to come up with a layout that focuses on the vista — whether it’s something as stunning as a lake or as simple as your backyard.
3. Keep Privacy in Mind
It’s always nice when you can leave the bedroom door open without forsaking all of your privacy. The Designers at HomesReinvented by SatinTouch always try to avoid designing a layout in which you look directly into the bedroom from a more public space, like a great room, kitchen or family room.
4. Connect With the Outdoors
While this might not be feasible in all climates, connecting a room with the outdoors is a great way to make the space feel larger and admit more natural light. If your bedroom is on the ground floor (or is on the second story and has an adjacent terrace), adding a set of French doors can instantly increase visual space.
5. Consider the Furniture Layout
Your bedroom’s architecture should take your furniture into account. Bedroom floor plans usually have a bed wall — but what about dressers, nightstands, TVs, chairs and a desk? Work with your architect or designer to make sure there is enough space beside the bed for nightstands and ample circulation so you can access three sides of the mattress.
6. Increase Light and Ventilation
Locating your bedroom at the corner of your home can give you windows on two or more adjacent walls. This gives you the added benefit of cross ventilation and a softer natural light.
How to Choose a Paint Color

Erin Carlyle offer tips for examining your closet, memories and daily life to find the right paint colors for your home.
Putting a new paint color on the walls is one of the quickest and most cost-effective ways to transform a room. But where do you start if you haven’t already picked out a color? An interior designer from HomesReinvented by SatinTouch or color consultants can help you hone in on the general color you want, such as yellow, gray, white or green. A pro can also advise you on the specific paint color to choose.
But before you commit, it’s worth considering which colors you truly love. We interviewed three interior designers for their best tips on how to identify these colors. Their practical suggestions will have you feeling more color-confident in no time.
Whatever you do, don’t just head straight to the paint store to browse through the paint chips, or you risk being majorly overwhelmed. Of course, if you’ve already done this, you’re not alone. “People will actually hire a painter without knowing what colors they want to use yet,” says D.C.-based interior designer Kelly Porter. “Even before you go to the paint store, you really want to narrow down the colors. Even before you pick up the swatches.”
But how do you narrow down a color in the first place? Designer Keith Wardlaw of Plus Modern Design in Kansas City, Missouri, suggests examining your wardrobe. “I tell clients, No. 1, to look in their closet and see what colors they wear often,” he says. “They’re going to gravitate toward certain colors that look well on them. Obviously, what better way to look great in the interior than if you paint what you look great in?”
A. Visit Your Closet
Whatever you do, don’t just head straight to the paint store to browse through the paint chips, or you risk being majorly overwhelmed. Of course, if you’ve already done this, you’re not alone. “People will actually hire a painter without knowing what colors they want to use yet,” says D.C.-based interior designer Kelly Porter. “Even before you go to the paint store, you really want to narrow down the colors. Even before you pick up the swatches.”
But how do you narrow down a color in the first place? Designer Keith Wardlaw of Plus Modern Design in Kansas City, Missouri, suggests examining your wardrobe. “I tell clients, No. 1, to look in their closet and see what colors they wear often,” he says. “They’re going to gravitate toward certain colors that look well on them. Obviously, what better way to look great in the interior than if you paint what you look great in?”
Browsing your wardrobe can also help you come up with ideas for accent colors. For instance, if you tend to wear a lot of blue and often pair it with khaki, tan leather shoes and silver jewelry, perhaps those colors could be a theme for your home. You could translate that theme to your living room with blue walls, soft leather furnishings, and gray (or silver) for other accents like the rug and toss pillows shown in this photo by Jen Samson Design.
B. Unearth Your Happy Memories
Porter, the D.C. designer, holds color workshops in which she gives a questionnaire about personal associations with particular colors. “What color was your room growing up?” she asks. “What color makes you the happiest?”
Inspiration can come from anywhere. “Maybe your grandmother’s kitchen was yellow, and you have great memories of traveling with her. Maybe you saw this great shade of blue when you were traveling in the Caribbean, and it calms you,” she says.
If no colors come to mind from your memories, try getting out a photo book from one of your favorite trips and seeing if any colors speak to you. As you go about your days, visiting restaurants, shops and even other people’s homes, pay attention to which colors you’re most drawn to.
There are no real rules about color, Porter says. One of her clients painted her bedroom a bright red — generally considered to be an invigorating rather than soothing color. While red may cause many people to feel alert when it’s time to be sleepy, “it was very calming to her,” she says. “You really have to know what moves you and not be influenced by what other people like and what other people say.”
C. Envision the Feeling You Want
So you’ve decided to paint your room blue. How do you narrow down which blue? It can be helpful to think about the feeling that you want to create in the room, Wardlaw says. If you’re seeking a cozier feel, choose a blue on the darker end. If you’re going for a more serene vibe, a lighter, perhaps sea blue may be better.
As you’re drawn to shades of blue, pay attention to whether you prefer blues that tend toward lavender, green or pure hues. Knowing the undertones of the shade you’re selecting is useful for coordinating with trim and accessories. A good designer, like those at HomesReinvented by SatinTouch, will be able to identify these undertones and help you select a paint that works with your furnishings.
You’ll also want to keep in mind whether your paint color should have cool or warm undertones — and again, a designer can be invaluable in helping you identify these subtleties. If you’re starting from a blank slate, a cool gray or a warm gray might suit you equally. But if you already have furniture and accessories in warmer hues, you may want to choose a warmer tone that complements what you already have.
D. Seek Inspiration
Browse photos online for general color and style ideas, and “tone and value inspiration — meaning light or dark or medium,” advises designer Carl Mattison of Atlanta-based Carl Mattison Design. But keep in mind that the way colors read on your computer screen or mobile device probably won’t be the way they read in your room, where they’ll be affected by the amount of light and even the landscaping that the light is coming through.
If you fall in love with a color online, go out and select a swatch and bring it home before committing. Even color chips won’t be exactly how the paint color will appear, so it’s important that you actually test out the paint on your walls.
Tip: As you’re browsing for inspiration (a friend’s home, new home tours, open houses, etc.), look for rooms that are similar in size and shape to the one that you’ll be painting; that way, the effect will be more similar.
Narrow Down Your Options to No More Than Four Colors
Once you’ve settled on a general color, your designer can save you a lot of time by suggesting a few excellent paint color choices and helping you choose the best option among them.
However, if you like to be more involved in the selection process, you might head to the paint store and pick out several chips and bring them home. Then it’s time to winnow them down.
“Say you come home with eight shades of blue,” Porter says. “Lay all the swatches out and compare them to each other. You will start to see the subtle differences between each color. Some of the blues lean toward green or aqua. Some are a denim shade. Some have a funky undertone that you just don’t like at all.”
Winnow down the options to three or four colors. You can tack the color chips to the wall of the room you’ll be
painting, or use a sheet of paper as a neutral background. Keep in mind as you make your comparisons that the paint chips will appear a bit darker on a light background, and lighter on a dark background, Porter says. “Often, after comparing the paint chips to each other, it will be pretty clear which color is going to work,” she says.
If you still aren’t comfortable with the color options, you could consider taking away all but one option and looking at each color individually.
Also, this may sound obvious, but it’s easy to forget: As you assess colors, consider how each option will look with the elements of your room already in place (and that you’re not willing to change).
Put Paint Samples Right on the Wall
Once you’ve chosen your three or four final colors, it’s time to test them. All three of our experts agree: It’s better to paint the wall than those sample boards the paint store sells. This is not just because it’s more economical. “You need to paint at least a 1-by-1-foot square on all four walls,” Wardlaw says. “You paint on the wall because that’s exactly where it’s going. You’re painting over a previous color. I feel a board doesn’t saturate in the same way.” Mattison recommends painting an even larger area — at least 3 feet by 3 feet — for each sample color.
Porter advises placing the paint samples side by side on the wall. “They should still be lined up because one would still need to compare and choose based on the process of elimination,” she says. Again, if this is overwhelming for your eye, you could consider looking at them apart.
It’s also important to make sure the sample can you purchase has the finish that you’re planning to use (matte, eggshell, satin, high gloss) because that can also change the way a color reads. Many stores sell the sample-size cans only in the matte finish. You may want to consider buying a full quart to get the true effect.
Look at the samples on the wall at various times of day, and try different types of lighting (various wattages) to see how that may change the colors. Live with the colors for a few days. When a clear winner emerges, you’re ready to paint the walls.
How to Choose the Best Sink Type for Your Kitchen
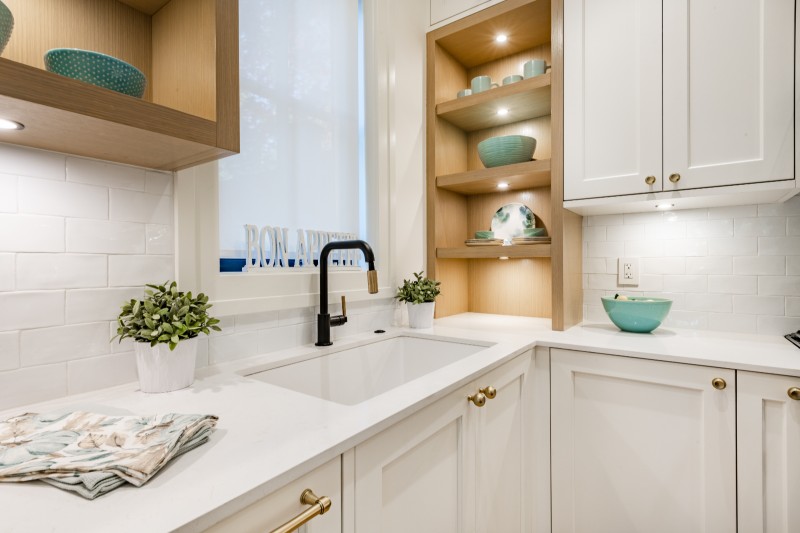
Drop-in, undermount, integral or apron-front — the design pros at HomesReinvented lay out your sink options.
Once you’ve decided on the material for your next kitchen sink, you’ll want to decide what kind of installation to do. There are four basic types of sink mounting, and each has pros and cons.
You’ll want to consider each option with the way you cook and clean in mind. Here’s what to know about mounting types for kitchen sinks.
1. Apron-Front or Farmhouse-Style
Apron-front sinks, also known as farmhouse sinks (see picture to the left), have a broad, exposed front edge and are usually quite wide and deep.
These charming sinks have come a long way from their humble beginnings in the 18th century as a butler’s sink. The size and shape were introduced to accommodate larger objects, and the sinks were quickly put to use to wash everything from household items to clothes and even children. They’ve evolved through the years to become one of the most popular styles of kitchen sinks.
While these sinks were traditionally single-bowl, they now come in divided two-bowl configurations. They are also available in a wide variety of materials, such as fireclay, cast iron, stainless steel, natural stone, manufactured solid surfaces and copper.
These are certainly attractive sinks, but there are a few issues to keep in mind if you are considering installing one in your kitchen. Apron-front sinks are typically wider, deeper and heavier than other sink types, so they may require at least a 36-inch-wide sink cabinet. The sink cabinet also must be able to accommodate the apron front.
If you go for a stainless steel or copper version, be aware that the apron can get scratched from contact with belt buckles or metal buttons. And, unless you choose an undermount installation (with the countertop extending over the sink edge), there will be a seam between the sink and countertop in which moisture and gunk can collect.
2. Undermount
Undermount sinks (see next page for photo) get attached to the underside of the countertop for a smooth look and an easy-to-clean design. Undermount and apron-front sinks often require professional installation and can only be mounted to a sturdy and nonporous countertop material, which can add considerable cost to the project. Installation is more expensive than for a drop-in sink, because the countertop opening has to be cut precisely.
It’s also worth noting that while I have heard of successful applications with wood countertops, extra care must be taken to protect the wood from water. Some laminate countertop manufacturers also claim that you can undermount a sink to their material. Discuss it with a design or build pro or a countertop retailer to see if this is an option for you.
Depending on your particular undermount sink, you may have some options regarding the reveal — how much or little of the top edge of the sink is visible just below the inside edge of the countertop.
A positive reveal leaves a small portion of the sink edge exposed. This is the easiest type of installation, as the cutout doesn’t have to be as precise as it does for a zero reveal. It also allows you to keep an eye on the status of the sealant between the sink and countertop, and more easily reapply it in the future as needed. The downside of a positive reveal is that the exposed edge tends to collect gunk and grime.
With a negative reveal, the countertop extends slightly beyond the edge of the sink, offering the cleanest look.
But that overhanging countertop can catch objects as you lift them out of the sink, causing chips or breakage to both the countertop and objects. It’s also more difficult to keep tabs on the seal between the sink and countertop.
A good hybrid, then, is the zero or flush reveal. Here the countertop is cut to the exact dimension of the sink, so there is no place for water and food to collect and also no lip that can cause damage or get damaged. This can be a more expensive installation, however, because the countertop opening has to be cut precisely.
Talk with your designer at HomesReinvented by SatinTouch or any other construction professional about what type of reveal you want for your undermount sink.
3. Drop-In
Drop-in sinks are installed on top of or over the countertop. These tend to be the most budget-friendly sinks, primarily because they are the easiest to install.
This is a popular sink style for those on a tight budget, for those installing a sink within a porous countertop body material (such as wood or laminate) or for those looking to repurpose a vintage sink or get a vintage look.
As mentioned, drop-in sinks are installed by “dropping” the sink into a cutout in the countertop material and then sealing around the edges where the sink lip meets the countertop. The obvious downside to a drop-in sink is that the raised lip makes it more difficult to wipe food particles directly into the sink, as you can with an undermount sink.
Whereas undermount sinks have a clean, minimalist feel, drop-in sinks — especially vintage or vintage-look sinks — can bring a charming appeal to the kitchen, creating a fantastic focal point.
4. Integral
Integral sinks are made from the same material as the countertop, often fabricated as a seamless unit within the countertop. If you’d like to have your kitchen sink blend in, and you are installing stone, metal, solid-surface, concrete or quartz countertops, think about having an integral sink fabricated. Your countertop fabricator will form a sink using the countertop material. The look is very clean and seamless — perfect for a contemporary kitchen.
Integral sinks are generally the most expensive type due to the cost of the raw material and fabrication — these sinks are usually custom-designed and custom-manufactured — in addition to the cost of installation. But for those with the budget for it, it’s certainly an appealing option.
The 4 Stages of a Remodel: The Midproject Crisis (Continued in October)

Prepare for the mechanical rough-in stage, and don’t worry if things don’t look like they’re progressing on the surface.
In the August Edition, we covered the ins and outs of what I refer to as the Honeymoon Phase of construction. Next up is a stage similar to a concept most everyone is familiar with: the Midlife Crisis. (Whether you’ve experienced one or not is an entirely different story.) It often comes with questions like, “What am I doing? Where am I going? What is the meaning of life?”
Likewise, the second phase of a home remodel, which I fondly refer to as the Midproject Crisis, is paired with parallel questions: What’s my contractor doing? Are we still moving forward as planned? Was this really all worth it? And of course: What is the meaning of life?
Fear not: Your contractor is working hard, your project is moving forward and, yes, your decision to renovate your home is, and will be, worth it. I can’t really speak about the meaning of life, but I can speak about the experiences of homeowners and remodelers during this period of a remodel.
Typically, once demolition and framing is finished (the Honeymoon Phase) and before sheetrock is put up, mechanicals will begin. (This probably is referred to as “mechanical rough-in” or “mechanical rough” by your contractor.) Mechanicals refer to the guts of the house: electrical; plumbing; and heating, venting and air conditioning (HVAC). Like our own guts, most of the work done during mechanicals occurs behind the scenes.
So what is going on behind the scenes? Let’s break it down by type of work.
Electrical. The groundwork for all new light fixtures, outlets, switches and appliances will be done during this phase. New wiring will be run in the walls and ceilings, electrical boxes will be installed for future fixtures, and electrical panels may be upgraded so they can handle heavier loads (this is especially prevalent in remodels where appliances are added). At this point, electricians are making sure that everything that will need power will have access to it and meet your municipality’s building code.
Plumbing. As with electrical, plumbing rough-in ensures that all plumbing fixtures, appliances and other water features will be supplied with water, gas (if your house uses natural gas) or both. So pipes may be moved or installed in new places, shower pans (the things that make sure the water stays in the shower) are installed and inspected, and gas lines may be moved, extended or even put in.
HVAC. Unlike electrical and plumbing, HVAC is the only mechanical where nearly all the work is completed during the rough-in stage. Pathways for new vents (for bath exhaust fans or kitchen vent hoods) are determined and vents are installed, air conditioning units may be replaced, and air return vents are located in appropriate positions.
All this sounds exciting, right? No doubt, it is. But the progress isn’t as visual as it is in the Honeymoon Phase. Since everything occurs behind walls, under foundation or in attics, the big “wow” just isn’t there like it is when everything is torn apart.
It’s around this time that I’ve often seen homeowners concerned about progress. Yes, plumbers are there, but where are the new sinks?
Why isn’t there a single light fixture installed yet?
Is the HVAC guy even working, or is he just taking a nap in the attic?
The other contributing factor to the crisis is the fact that any speed bumps that crop up during this phase take a bit more time to resolve.
Overall, the placement of existing framing is the biggest obstacle in mechanical rough-ins.
If your plans specify that there is going to be a can light in Location A, but Location A has a structural beam directly above it — no can do. Or say your architect has designated a toilet to be mounted on the wall instead of on the ground, but existing wall framing prevents this from being a viable option. Back to the drawing board. Or maybe your HVAC contractor needs to be able to provide ductwork to a new vent hood location in your kitchen, but there is no open attic space to place the ducts. Time to think through the alternatives.
Another obstacle, which is less common but should still be noted, is the condition of existing mechanicals. Any wiring, plumbing or venting that is found to be damaged, dangerous or just not up to par with your municipality’s building code will likely need to be remedied.
And don’t even get me started on inspections. If your job is permitted, inspections for mechanicals will occur during this stage. City building inspectors are well known for being thorough. If you don’t have everything just right (which ultimately is good, because they’re looking out for your safety), they will not hesitate to make your contractor fix the issue before any work can continue.
So we’re halfway there. What’s next? Is the light at the end of the remodeling tunnel finally visible?
When will your house start to look like a home again? What is the meaning of life? (I’ll tell you one last time — I can’t help with the meaning of life!)
But for more information on the next phase of a remodel, look for the next installment in this series in our October Edition: the Renewal of Vows.


A large majority of homeowners (84%) upgrade their backsplash during a kitchen remodel. Tile is the top choice (85%) and ceramic or porcelain is the top material (67%).
A common remodeling decision homeowners face is where to stop their backsplash. Fully covering the area from the countertop to the cabinets or range hood is the most popular option (61%), though it declined in popularity by 5 percentage points year over year. Partial coverage ticked up 2 points to 21% in the same period.
About 1 in 10 homeowners (11%) fully cover the area up to the ceiling, while 4% choose to partially cover the area.
As mentioned earlier, white is the most common backsplash color choice (41%), followed by multicolored (16%, down 4 points) and gray (12%).